Vinyl plank flooring, with its attractive appearance, durability, and easy maintenance, has become an increasingly popular choice for homeowners and contractors. The secret to getting the most out of its looks and usefulness is choosing the right direction to install vinyl plank flooring. Its adaptability makes it an ideal choice for various settings, from homes to commercial spaces.
Understand the Focal Points of Your Room
First, look at what stands out in your room. Things like fireplaces, big pieces of furniture, windows, or cool building parts can guide you. Lining up the planks to show off these features works well. For instance, in a living room with a big fireplace, you might want to lay the planks so they run across the room from the fireplace.
Leveraging Light and Layout for Optimal Plank Orientation
The direction of incoming natural light is another aspect to consider. Aligning planks with the light flow can create a cohesive look and enhance spatial perception. In spaces lacking a clear focal point, the room’s shape and layout can guide the plank orientation. Aligning planks with the longest wall can make a room appear larger, while parallel alignment to the shorter wall can add coziness.
Explore the Directions to Install Vinyl Plank Flooring
After pinpointing your room’s focal points and layout, it’s essential to delve into the various orientations available for your vinyl plank flooring. The primary directions for laying vinyl plank flooring generally encompass three options:
1. Horizontal (or Lengthwise) Installation
Placing the vinyl planks horizontally, often referred to as lengthwise, is a widely embraced method. This alignment tends to broaden the visual perception of the area, rendering it more spacious. It’s especially beneficial in slender areas like corridors, where it can foster the illusion of a broader space.
2. Vertical (or Crosswise) Installation
On the other hand, placing the planks vertically or in a crosswise pattern creates a special look. This way, the planks can help draw the eye to something specific, like a big fireplace or a large window. Also, using a vertical layout in rooms with high ceilings can help make the space feel more balanced and even.
3. Diagonal (or Angled) Installation
Opting for a diagonal or angled placement at a 45-degree tilt can add an inventive and lively flair to your setting. This strategy shines in areas with unconventional contours or sloped walls, as it can mask inconsistencies and unify the appearance. However, it’s important to acknowledge that a diagonal layout demands more intricate planning and effort.
Evaluating the Pros and Cons of Directional Options
Choosing the right way to lay vinyl plank flooring matters. It changes how a room looks and feels. If your room is big and open, laying the planks side by side is a good idea. It makes the room look even bigger and more connected.
If your room is long and narrow, or if you have something special like a big window, think about laying the planks so they point towards that special thing. This makes the room more interesting. Remember, laying planks side by side makes a room feel wide and open. But if you lay them from top to bottom, the room might feel cozier. Diagonal patterns are cool but can make a room look a bit busy. So, think about what your room is like and what you like. This will help you pick the best way to lay your flooring.

Prepare for a Successful Vinyl Plank Installation
Regardless of the direction you choose for your vinyl plank installation, proper preparation is essential to ensure a professional-quality final result. Here are the key steps to consider:
1. Remove the Existing Floor
While some vinyl plank products, such as click-lock systems, can be installed over existing flooring, it’s generally recommended to completely remove the existing floor before beginning the new installation. This ensures a clean, flat surface and eliminates any potential issues caused by uneven or damaged subfloors.
2. Ensure a Flat Surface
One of the most critical factors for a successful installation of vinyl plank flooring, including the direction to install vinyl plank flooring, is a completely flat subfloor. Even the slightest bumps, protrusions, or irregularities can cause issues with the vinyl planks, leading to an uneven or unsightly finish. Be sure to thoroughly inspect the subfloor and address any irregularities before proceeding.
3. Properly Prepare the Subfloor
In addition to being flat, the subfloor must be clean, dry, and free of any debris or contaminants. This may involve sweeping, vacuuming, or even sanding the surface to ensure a pristine foundation for the vinyl planks.
4. Install Underlayment
While some vinyl plank products may not require underlayment, it’s generally considered a best practice to include it in your installation. Underlayment provides several important benefits, including:
- Ensuring a stable and secure installation by preventing the floor from shifting or moving
- Offering cushioning and sound-dampening properties to create a more comfortable walking surface
- Protecting the vinyl planks from potential subfloor imperfections and helping to extend the lifespan of the floor
5. Acclimate the Vinyl Planks
Before beginning the installation, it’s crucial to allow the vinyl planks to acclimate to the room’s temperature and humidity levels. This helps to prevent issues like gapping, buckling, or expansion that can occur if the planks are installed without proper acclimation.
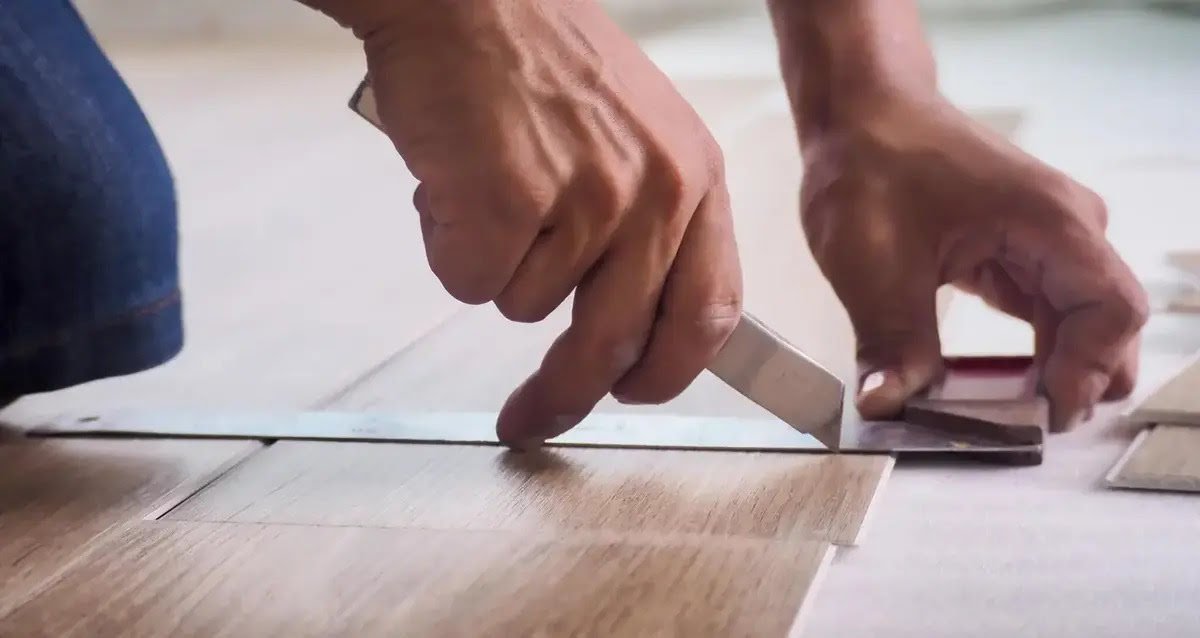
6. Plan the Layout and Cut Patterns
The layout of your vinyl planks depends on your room’s size and shape and the direction you pick. This can involve measuring the space, calculating the necessary number of planks, and determining the best placement of cut pieces to minimize waste and maintain a consistent, professional-looking finish.
7. Use the Appropriate Tools and Techniques
Vinyl plank installation, whether a floating or adhesive-based system, requires the use of specialized tools and techniques to ensure a successful outcome. This is one reason many homeowners rely on professional vinyl flooring installation for a cleaner, longer-lasting result.
Diligently preparing the underlayer, allowing the vinyl planks to acclimatize, and utilizing appropriate tools and methods are key steps for achieving a flawless, enduring installation. Selecting the optimal orientation for laying down vinyl plank flooring plays a pivotal role in this endeavor, profoundly influencing the room’s visual and spatial dynamics.
Final Thoughts
Choosing the right direction to install vinyl plank flooring is a critical decision that can have a significant impact on the final appearance and functionality of your floor. Recognizing your room’s focal points, examining various laying directions, and meticulous preparation for the installation are fundamental for a favorable result. This ensures a visually appealing, long-lasting vinyl plank floor. Professional flooring contractor ensures a durable, visually appealing vinyl plank floor with expert precision.